The Complete Guide to Carving Gourds: Tools, Bits, and Techniques for Homesteaders and Cottage Crafts
Gourds have been used by humans for thousands of years. Long before plastic containers and stainless-steel bowls, people relied on dried gourds to make drinking vessels, storage containers, musical instruments, lamps, and decorative artwork. From ancient Egyptian water jugs to West African calabash drums, gourds have served as humanity’s original multi-purpose container.
Today, gourds are experiencing a quiet revival among homesteaders, backyard growers, and cottage-industry artisans. If you grow gourds or buy them from local farmers, they can be transformed into beautiful and profitable handmade products such as:
- Decorative bowls and serving vessels
- Lamps, lanterns, and pendant lights
- Serving trays and cheese boards
- Jewelry and wearable art
- Sculptures and relief carvings
- Wall art and decorative panels
- Birdhouses and wildlife habitats
- Musical instruments (maracas, shakers, stringed instruments)
- Planters and propagation vessels
But working with gourds requires the right tools and knowledge. Their outer shell is surprisingly hard—closer to hardwood than to a vegetable. Proper preparation, tool selection, and technique make the difference between a frustrating experience and a rewarding creative practice.
One of the most effective tools for carving gourds is a rotary tool. With the right bits, a rotary tool allows you to drill, carve, engrave, sand, and shape gourds with precision.
In this expanded guide, we’ll cover:
- The best rotary tools and micro-carvers for gourd work
- Comprehensive bit selection: carbide, diamond, ruby, and specialty burrs
- Why gourds produce smoke when drilled—and how to prevent it
- The ideal beginner setup AND professional upgrade path
- Advanced carving techniques: relief, pierced work, texturing
- Finishing methods: oils, sealants, pyrography, and painting
- How homesteaders can turn gourds into a profitable cottage craft business
- Safety protocols, dust management, and tool maintenance
By the end of this guide, you’ll know exactly what tools you need, how to prepare your gourds properly, and how to start carving gourds safely, effectively, and profitably.
Why Gourds Are Perfect for Homestead Crafts
Many homesteaders grow gourds for decoration, but few realize how versatile they are once properly dried and prepared.
Understanding Gourd Types
Not all gourds are created equal for carving. Understanding the differences helps you select the right material for your project:
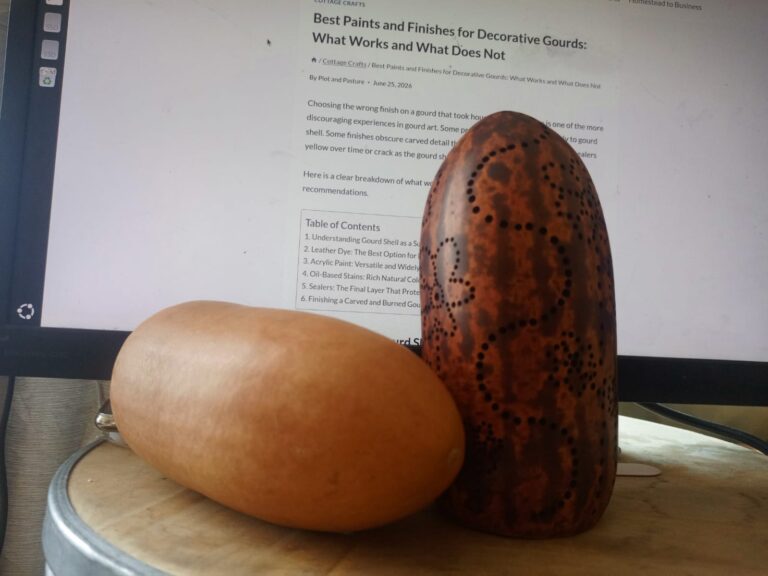
Hard-Shell Gourds (Lagenaria siceraria)
Also known as calabash gourds, these develop a woody outer shell that can last for decades when properly cured. Once dried, the shell becomes rigid and durable—almost like lightweight balsa wood but with unique grain patterns.
Best for: Structural projects (bowls, containers, birdhouses, lamps), deep relief carving, functional items
Ornamental Gourds (Cucurbita species)
These colorful, often bumpy gourds have thinner shells and are primarily decorative. They cure faster but are more fragile.
Best for: Surface engraving, painting, small decorative items, seasonal crafts
Bottle Gourds vs. Dipper Gourds
- Bottle gourds: Narrow neck, rounded body—ideal for vessels, lanterns, birdhouses
- Dipper gourds: Long handle, cup-shaped end—perfect for ladles, scoops, decorative handles
Why Hard-Shell Gourds Excel for Crafting
Once properly dried, hard-shell gourds offer unique advantages:
- Carving: The woody shell holds fine detail without splintering
- Engraving: Clean lines possible with diamond or fine carbide bits
- Pyrography: Wood-burning tools create beautiful contrast on the pale interior
- Painting: Smooth surface accepts acrylics, stains, and natural dyes
- Sanding: Can be polished to a silky finish
- Drilling: Holds clean holes for hardware, hanging, or assembly
Because they are lightweight, hollow, and naturally waterproof when sealed, gourds are also perfect for making:
- Lamps and lanterns (heat-resistant when properly vented)
- Bowls and serving vessels (food-safe with appropriate sealants)
- Storage containers for dry goods, herbs, or small tools
- Birdhouses with natural insulation properties
For cottage industry makers, gourds offer another significant advantage: very low material cost. A single gourd grown in your garden or purchased for $2–$5 can be transformed into a product worth $20–$150+ depending on craftsmanship and market.
But to work with gourds effectively—and profitably—you need the right tools, preparation methods, and techniques.
Why a Rotary Tool Is the Best Tool for Gourd Carving
A rotary tool is essentially a handheld motor that spins small bits at very high speeds, making it ideal for the hard, fibrous material of dried gourds.
Most quality rotary tools operate between:
5,000 – 35,000 RPM (some micro-carvers reach 45,000+ RPM)
This speed range allows you to:
- Cut through the hard gourd shell without cracking
- Carve intricate patterns with precision control
- Drill clean entry/exit holes for lanterns or birdhouses
- Sand surfaces to a smooth finish
- Engrave delicate designs or lettering
- Texture surfaces for visual interest
Because rotary tools use small interchangeable bits, they offer much more control than standard drills or carving knives. The ability to switch bits in seconds means you can rough out a shape, refine details, and finish surfaces—all with one tool.
For gourd artists and homestead craft makers, rotary tools represent the most versatile, accessible, and cost-effective option available.
When to Consider a Micro-Carver Instead
For artists focused on extremely fine detail work (portrait carving, intricate lace patterns, miniature sculptures), a dedicated micro-carver may be worth the investment:
- Higher RPM: Up to 45,000–50,000 for ultra-fine control
- Less vibration: Brushless motors reduce hand fatigue during long sessions
- Specialized collets: Accept smaller shank sizes (1/16″, 3/32″) for delicate bits
- Forward/reverse: Helps clear debris and reduce grain tear-out
However, micro-carvers cost $170–$500+ and are best suited for advanced users who carve regularly. Most homesteaders and beginners will find a quality rotary tool like the Dremel 4000 more than sufficient.
Best Rotary Tools for Gourd Carving: Detailed Comparison
Below are the most reliable rotary tools used by gourd artists, with pros, cons, and ideal use cases.
1. Dremel 4000 Rotary Tool Kit
Price: $80–$110 | Best For: Serious beginners to intermediate carvers
The Dremel 4000 is widely considered the gold standard for hobby carving tools, and for good reason.
Key features:
- Variable speed: 5,000–35,000 RPM with precise dial control
- Strong 1.2-amp motor handles thick gourd shells without bogging down
- Compatible with hundreds of Dremel and third-party attachments
- Ergonomic grip with soft-start feature reduces hand fatigue
- Separate on/off toggle switch prevents accidental activation
Why it works for gourds: This tool has enough power to cut through thick gourd shells while still allowing delicate engraving at lower speeds. The variable speed control is critical—starting slow prevents burning, while higher speeds enable efficient material removal.
Limitations: Corded only; can vibrate noticeably at highest speeds during extended use.
⭐ Recommended for serious gourd carving—the best balance of power, control, and value.
2. Dremel 4300 Rotary Tool Kit
Price: $110–$150 | Best For: Intermediate to advanced carvers wanting premium features
The Dremel 4300 is an upgraded version of the 4000 with thoughtful enhancements.
Features include:
- More powerful 1.5-amp motor for demanding projects
- Built-in LED lighting illuminates your work area—critical for intricate designs
- Quick-change chuck system reduces bit-swapping time
- Improved airflow design reduces motor heat during long sessions
- Same RPM range (5,000–35,000) with smoother speed transitions
Why the LED matters: When carving pierced lantern patterns or fine details, seeing exactly where your bit contacts the gourd prevents mistakes and improves precision. The light also helps identify surface imperfections before finishing.
Consider if: You carve regularly, work on detailed projects, or want the most user-friendly Dremel experience.
⭐ Best professional setup for homestead artisans who want reliability and premium features.
3. WEN 2305 Rotary Tool Kit with Flex Shaft
Price: $20–$30 | Best For: Absolute beginners testing the craft
For homesteaders experimenting with gourd carving on a budget, this is a very affordable entry point.
Features:
- Variable speed motor (8,000–33,000 RPM)
- Includes flex shaft attachment (a $15+ value separately)
- Lightweight design reduces hand strain
- 100+ accessories included (though quality varies)
The flex shaft advantage: Instead of holding the entire rotary tool, you hold a small, pen-like handpiece connected by a flexible cable. This dramatically improves control for detail work and reduces wrist fatigue. Many experienced carvers consider the flex shaft essential for intricate patterns.
Limitations: Less powerful motor may struggle with thick shells; accessories are basic quality.
Smart approach: Use this to learn fundamentals. If you enjoy the craft, upgrade to a Dremel 4000 and keep the WEN as a backup or for rough work.
⭐ Solid starter option – low risk, high learning value.
4. GOXAWEE Rotary Tool Kit (140-Piece)
Price: $35–$60 | Best For: Beginners wanting maximum accessory variety
This kit is popular with beginners because it includes a large number of accessories right out of the box.
Features:
- 140 attachments including bits, drums, wheels, and polishing tools
- Variable speed motor (8,000–33,000 RPM)
- Flexible shaft included
- Affordable all-in-one package
Reality check: Not all included bits are ideal for gourds. Many are designed for metal or plastic. Focus on the carbide burrs and sanding drums; set aside the rest for future projects.
Best use case: Learning bit functions, practicing techniques, and building confidence before investing in premium bits.
5. Micro-Carver Options (Advanced Users)
Price: $170–$500+ | Best For: Professional artists and serious enthusiasts
If you plan to carve gourds as a primary craft or business, consider these specialized tools:
Ram BP50 Brushless Micromotor (~$475)
- Brushless motor: less vibration, longer life, quieter operation
- 50,000 RPM with digital speed display
- Forward/reverse switch helps clear debris
- Sealed motor housing resists gourd dust infiltration
Foredom K.1070 Micromotor Kit (~$400)
- Industry standard for professional woodcarvers
- Foot pedal control frees both hands for positioning
- MH-170 handpiece designed for precision work
- Excellent torque at low speeds for controlled removal
Budget Micro Option: Ram iCube (~$180)
- Compact, portable design ideal for travel or small workspaces
- 45,000 RPM with digital display
- Good entry point to micro-carving without $400+ investment
When to upgrade: If you find yourself carving 10+ hours per week, struggling with detail work on a rotary tool, or selling pieces where precision impacts value.
The Most Important Part: Carving Bits—Expanded Guid
When carving gourds, the bits matter more than the rotary tool itself. Cheap or inappropriate bits will:
- Burn the gourd surface, creating dark, rough edges
- Produce excessive smoke and unpleasant odor
- Wear out quickly, requiring frequent replacement
- Leave rough, splintered edges that require extensive sanding
- Vibrate excessively, reducing control and increasing fatigue
High-quality bits cut cleanly, reduce heat buildup, and last significantly longer. Here’s a comprehensive breakdown of bit types every gourd carver should understand.
1. Tungsten Carbide Burrs: Your Primary Workhorse Bits
These are the primary carving bits used by most professional gourd artists. Carbide is harder than steel and maintains a sharp edge through extended use.
Key features:
- 1/8″ shank (fits most rotary tools and micro-carvers)
- Extremely sharp, durable cutting edges
- Designed for hard materials: wood, hardwoods, composites, and gourds
- Available in multiple shapes for different tasks
Common shapes and their best uses:
| Shape | Best For | Technique Tip |
|---|---|---|
| Ball/Sphere | Hollowing, rounding, creating domes | Use the side of the ball for smooth curves |
| Cylinder/Barrel | Straight cuts, channeling, flattening areas | Keep bit perpendicular to surface for clean lines |
| Flame/Tapered | Detail work, lettering, fine lines | Use tip for finest details, side for broader strokes |
| Tree/Inverted Cone | Undercutting, relief carving, creating depth | Angle bit to carve “behind” surface features |
| Oval/Egg | Smoothing transitions, blending carved areas | Use light pressure for seamless finishes |
Pro tip: Buy a small set (5–7 bits) covering these shapes rather than a huge kit. You’ll use 80% of your work with just 3–4 bits.
Brand recommendations: Saburr Tooth (structured tooth design cuts faster), Kutzall Extreme (hybrid performance), or high-quality generic carbide sets from reputable tool suppliers.
2. Diamond Burr Bits: For Detail Work and Finishing
Diamond bits have industrial diamond particles bonded to a steel core. They don’t “cut” like carbide—they abrade material away, producing extremely smooth results.
Best uses include:
- Fine details: lace patterns, delicate lettering, portrait work
- Thin gourd walls: where aggressive bits might break through
- Etching patterns: shallow surface designs with crisp edges
- Surface engraving: creating texture without deep removal
- Final smoothing: refining edges after carbide work
Advantages over carbide:
- Smoother finish with less sanding required
- Less likely to catch or tear gourd fibers
- Excellent for final detailing on finished pieces
Limitations:
- Slower material removal (not for roughing out)
- Diamond coating can wear if used on very hard spots
- More expensive per bit than carbide
Pro tip: Use diamond bits at medium-high speeds (20,000–30,000 RPM) with light pressure. Let the diamonds do the work—pressing hard generates heat and reduces bit life.
3. Sanding Drums and Abrasives: Essential for Professional Finis
After carving, sanding drums help clean up rough edges and prepare surfaces for finishing.
Common uses:
- Smoothing cut openings (lantern tops, bowl rims)
- Refining carved areas to remove tool marks
- Removing minor burn marks or discoloration
- Preparing surfaces for sealants, paints, or pyrography
Grit progression for best results:
- 80–120 grit: Remove major tool marks and rough edges
- 180–220 grit: Smooth surface for finishing
- 320+ grit: Final polish before sealing (optional)
Pro tips:
- Use a light touch—sanding drums can remove material quickly
- Keep the drum moving to avoid creating low spots
- Change sanding bands frequently; worn bands generate more heat
- For curved surfaces, use flexible sanding pads or hand-sand with folded paper
Alternative: Flexible shaft attachments with mandrels allow using standard sandpaper discs for larger surface areas.
4. Specialty Bits Worth Knowing
Ruby Burrs
- Industrial ruby particles bonded to steel
- Extremely durable, non-plugging design
- Excellent for hardwoods and dense gourd shells
- Price: ~$20/bit; worth it for professional work
High-Speed Steel (HSS) Cutters
- Less expensive than carbide
- Good for soft gourds or initial practice
- Dull faster on hard shells—best as backup bits
Pyrography Tips for Rotary Tools
- Use specialized wood-burning tips that fit rotary collets
- Lower speeds (5,000–15,000 RPM) prevent scorching
- Practice on scrap gourd pieces first to master temperature control
Polishing Bits
- Felt wheels with polishing compound for high-gloss finishes
- Use after final sanding and before sealing
- Best for decorative pieces, not food-contact surfaces
Why Gourds Produce Smoke When Drilling: The Science and Solutions
Many beginners notice smoke when drilling or carving gourds. This isn’t just annoying—it indicates problems that can ruin your piece and damage your tools.
The Three Primary Causes
1. Excessive Speed + Friction = Heat
High RPM generates friction. If the bit isn’t cutting efficiently (due to dullness, wrong type, or improper technique), friction creates heat instead of removing material. This heat:
- Burns the gourd’s natural resins, producing smoke
- Darkens the shell, creating unwanted discoloration
- Can weaken the gourd structure around the cut
- Shortens bit life through premature dulling
Solution: Start at lower speeds (10,000–15,000 RPM) and increase only as needed. Let the bit’s sharpness do the work, not speed.
2. Dull or Inappropriate Bits
Cheap bits often scrape rather than cut. Scraping produces heat instead of cleanly removing material. Signs your bit is dull:
- Increased pressure required to make progress
- Rough, torn edges instead of clean cuts
- Visible smoke or burning smell during use
- Bit feels “grabby” or vibrates excessively
Solution: Invest in quality carbide or diamond bits. Clean bits regularly (see maintenance section). Replace when cutting performance declines.
3. Too Much Pressure
Pressing hard forces the bit to rub instead of cut. This is especially common when beginners try to “hurry” the process.
Solution: Use light, steady pressure. Let the tool’s speed and the bit’s sharpness remove material. If progress is slow, check bit sharpness or reduce speed—not increase pressure.
Pro Tips to Prevent Smoke and Achieve Clean Cuts
To avoid smoke while carving and produce professional results:
✅ Use sharp, appropriate bits – Carbide for removal, diamond for detail
✅ Start at medium speeds (12,000–20,000 RPM) and adjust as needed
✅ Apply light pressure – Let the bit do the work
✅ Take short, controlled passes instead of deep, aggressive cuts
✅ Clear dust frequently – Buildup insulates heat and reduces cutting efficiency
✅ Work in short sessions – Bits and motors heat up with continuous use
✅ Use compressed air or a small brush to clear cut areas between passes
✅ Keep bits clean – Resin buildup reduces cutting efficiency (see maintenance)
Advanced technique: For deep cuts or thick shells, use a “pecking” motion—brief contact, withdraw to clear debris, repeat. This prevents heat buildup and gives you better control.
Preparing Gourds for Carving: The Complete Curing Process
Before carving, gourds must be properly harvested, cleaned, and cured. Skipping steps leads to mold, cracking, or poor carving results.
Step 1: Harvesting at the Right Time
Gourds are ready for harvest when:
- The stem turns brown and begins to dry
- The shell feels hard and cannot be pierced with a fingernail
- The gourd sounds hollow when tapped
- Surface color has fully developed (varies by variety)
Critical: Harvest before the first hard frost. Frost damage compromises the shell’s integrity and invites rot.
Cut gourds from the vine with 2–3 inches of stem attached. Never pull or twist—this can damage the stem seal and allow moisture/mold entry.
Step 2: Initial Cleaning
Dried gourds often have surface mold, dirt, and plant residue. This is normal and doesn’t indicate spoilage.
Cleaning method:
- Wear gloves and a dust mask (mold spores are airborne)
- Scrub with warm, soapy water and a stiff brush or copper scrubber
- For stubborn mold: wipe with diluted vinegar (1:1 water:vinegar) or rubbing alcohol
- Rinse thoroughly and air-dry completely in a well-ventilated area
- Optional: Lightly sand the exterior with 120-grit paper to smooth rough spots
Never soak gourds for extended periods—this can introduce moisture into the shell.
Step 3: The Curing Process (Non-Negotiable)
Curing allows internal moisture to evaporate, hardening the shell and preventing future mold or cracking.
Proper curing method:
- Place cleaned gourds on a screen, rack, or hang with twine—never on solid surfaces where moisture can pool
- Store in a dry, dark, well-ventilated area (garage, shed, covered porch)
- Ensure gourds don’t touch each other—airflow is critical
- Rotate hanging gourds or turn rack-stored gourds every 1–2 weeks for even drying
- Allow 3–6 months for full curing (larger gourds take longer)
How to know when curing is complete:
- Gourd feels lightweight for its size
- Shell is uniformly hard with no soft spots
- Seeds rattle freely inside when shaken
- No musty odor when cut open
Warning signs during curing: Discard any gourd that becomes soft, develops foul odors, or shows signs of active mold penetration. One rotten gourd can spread mold to neighbors.
Step 4: Final Preparation Before Carving
Once cured:
- Wipe exterior with a damp cloth to remove curing dust
- Lightly sand the carving area with 180-grit paper for better bit grip
- Sketch your design with pencil, chalk, or transfer paper
- Secure the gourd in a vise, clamp, or non-slip mat before starting
Pro tip: For pierced work (lanterns), mark hole locations on both interior and exterior to ensure clean exit points.
Advanced Carving Techniques for Stunning Results
Once you’ve mastered basic cuts, these techniques elevate your gourd art.
Relief Carving: Creating Depth and Dimension
Relief carving removes background material to make designs “pop” from the surface.
Process:
- Transfer your design to the gourd surface
- Use a flame or tree-shaped carbide burr to lower the background areas
- Work from the outside of design elements inward
- Leave raised areas at varying heights for visual interest
- Refine edges with diamond bits for crisp definition
Pro tip: Undercut raised elements slightly to create shadow lines that enhance depth.
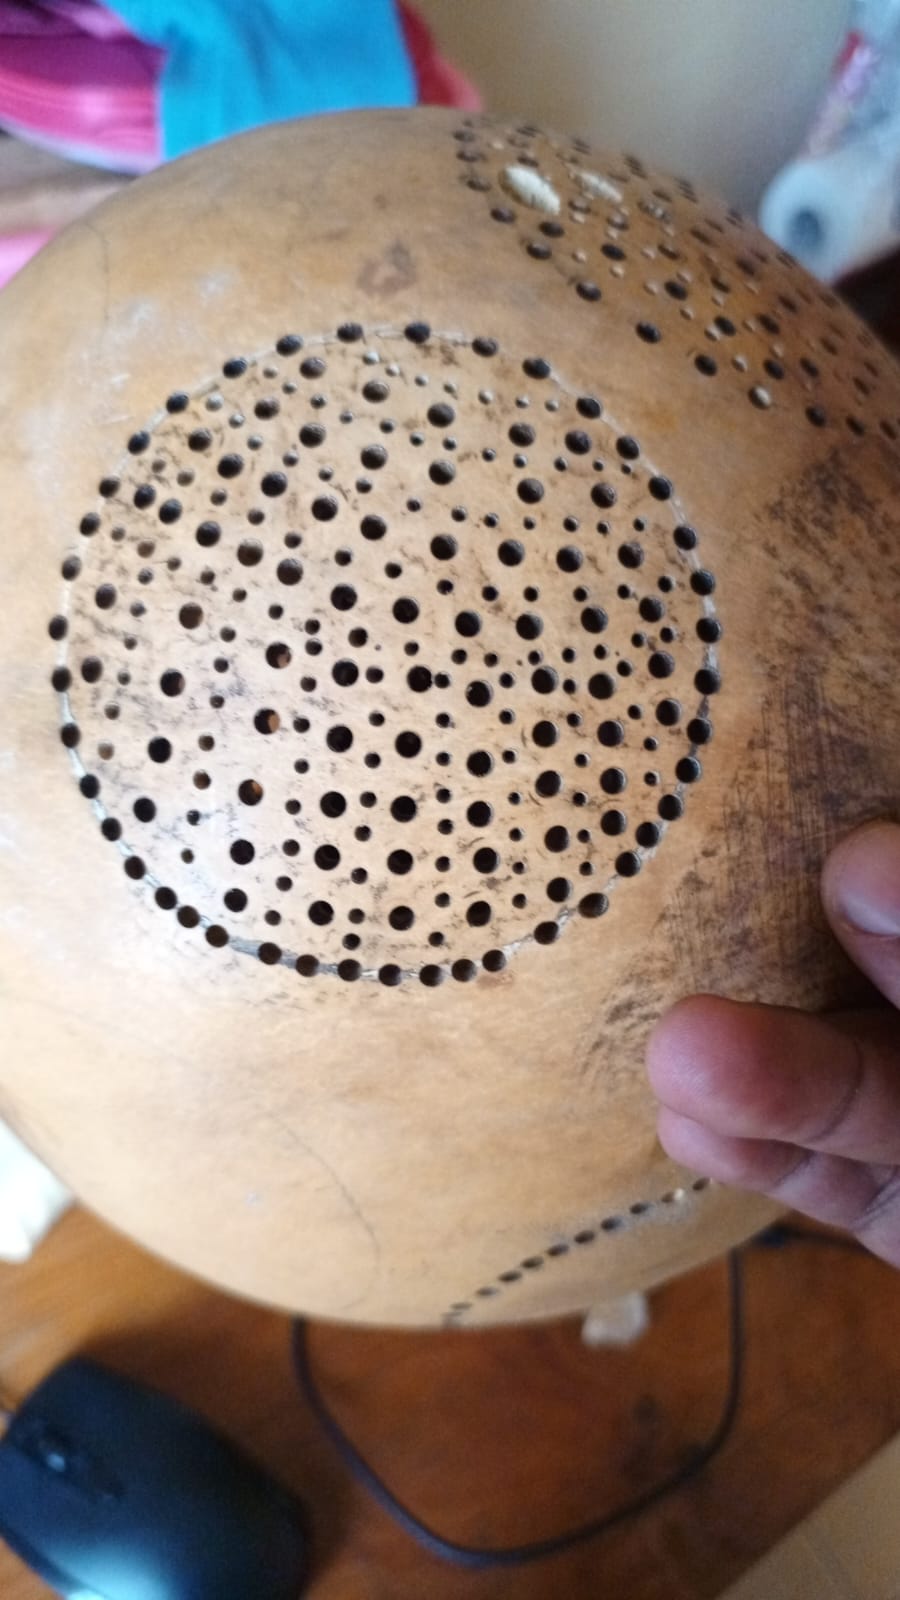
Pierced Work: Lanterns and Lace Patterns
Creating openwork designs requires planning and patience.
Key techniques:
- Drill pilot holes at pattern intersections before cutting outlines
- Use small ball or cylinder bits for clean hole edges
- Work from the interior outward when possible to control breakout
- Support thin sections with masking tape during cutting to prevent cracking
Design tip: Start with simple geometric patterns before attempting intricate lacework.
Texturing: Adding Visual and Tactile Interest
Texture transforms smooth gourds into dynamic art pieces.
Methods:
- Stippling: Use a small ball bit to create dot patterns
- Cross-hatching: Carve intersecting lines for woven effects
- Organic textures: Mimic bark, scales, or fabric with custom bit movements
- Combined techniques: Layer textures for complex surfaces
Pro tip: Practice textures on scrap gourd pieces before applying to finished work.
Pyrography Integration: Burning for Contrast
Wood-burning adds rich brown tones that contrast beautifully with the gourd’s natural pale interior.
Best practices:
- Use a dedicated pyrography pen or rotary-compatible burning tips
- Work on fully cured, sanded surfaces for even burns
- Start with light pressure and low heat; build intensity gradually
- Seal burned areas after completion to preserve contrast
Finishing Methods: Protecting and Enhancing Your Work
The right finish protects your carving and enhances its beauty.
Food-Safe Finishes (for bowls, serving pieces)
- Mineral oil: Inexpensive, non-toxic, enhances natural grain. Reapply periodically.
- Beeswax/mineral oil blend: Adds slight sheen and water resistance.
- Walnut oil: Beautiful finish but avoid if users have nut allergies.
Application: Apply with soft cloth, let penetrate 15 minutes, wipe excess. Cure 24–48 hours before food use.
Decorative Finishes (for art pieces, lanterns)
- Danish oil: Penetrates deeply, enhances grain, moderate protection
- Polyurethane (water-based): Clear, durable, non-yellowing finish
- Shellac: Traditional finish with warm tone; alcohol-soluble for repairs
- Acrylic sealers: Quick-drying, available in matte/satin/gloss
Application tip: Sand lightly with 320-grit between coats for ultra-smooth results.
Painting and Staining
- Acrylic paints: Versatile, fast-drying, water-cleanup. Seal after painting.
- Natural dyes: Walnut hulls, tea, or berry juices for earthy tones.
- Stains: Use wood stains sparingly; test on scrap first as gourds absorb differently than wood.
Pro technique: Paint the interior of lanterns with metallic or light colors to enhance light diffusion.
Final Polishing
For a luxurious hand-rubbed finish:
- Final sand with 400+ grit
- Apply finishing wax with soft cloth
- Buff with clean cloth or soft brush
- Optional: Light coat of furniture polish for subtle sheen
The Best Beginner Gourd Carving Setup: Budget to Pro
Starter Setup (~$50–$75)
- Tool: WEN 2305 or similar budget rotary tool with flex shaft
- Bits: Small carbide burr set (ball, cylinder, flame) + sanding drums
- Safety: Basic dust mask, safety glasses
- Extras: Pencil, transfer paper, clamps
Capabilities: Simple lanterns, basic bowls, introductory carving
Enthusiast Setup (~$110–$150) Recommended Starting Point
- Tool: Dremel 4000 with flex shaft attachment
- Bits: Quality carbide set + diamond detail bits + assorted sanding drums
- Safety: N95 respirator, safety glasses, hearing protection
- Extras: Design templates, finishing supplies (oil, wax)
Capabilities: Professional-quality lanterns, relief carving, detailed birdhouses, market-ready pieces
Professional Setup (~$300–$600+)
- Tool: Dremel 4300 or Ram/Foredom micro-carver
- Bits: Premium carbide (Saburr Tooth/Kutzall) + ruby/diamond sets + specialized abrasives
- Safety: Powered air-purifying respirator (PAPR) or high-quality half-mask, dust collection system
- Extras: Design software, photography setup, packaging materials
Capabilities: Gallery-quality art, complex pierced work, efficient production for business
Why a Flex Shaft Makes Carving Easier (And How to Use It)
A flex shaft attachment is one of the most transformative upgrades for gourd carving.
Instead of holding the entire rotary tool (which can weigh 1–2 lbs), you hold a small, pen-like handpiece connected by a flexible cable to the motor.
Benefits include:
- Better precision: Fine motor control similar to holding a pencil
- Less hand fatigue: Weight of motor rests on table, not in your hand
- Improved visibility: Smaller handpiece doesn’t block your view of the work
- Easier detail carving: Essential for intricate lantern patterns or portrait work
Pro setup tips:
- Mount the rotary tool in a bench stand or hang it securely
- Position the handpiece holder within easy reach
- Keep the flex shaft loosely coiled—tight bends reduce performance and lifespan
- Clean the handpiece collet regularly to prevent bit slippage
For detailed work like lantern patterns, floral designs, or lettering, the flex shaft makes a dramatic difference in control and comfort.
Simple to Advanced Gourd Projects for Homesteaders
Beginner Projects (Build Confidence)
1. Classic Gourd Lanterns
Why start here: Teaches drilling, basic shaping, and finishing with forgiving margins for error.
Steps:
- Select a bottle gourd with even walls
- Mark and drill a top opening (2–3″ diameter)
- Scoop out seeds and pulp; sand interior smooth
- Drill decorative hole pattern (start with simple geometric shapes)
- Sand all edges smooth; apply finish
- Insert LED candle or string lights
Pro upgrade: Add a wire handle, etch patterns around the base, or pyrograph a design.
2. Rustic Serving Bowls
Best gourd type: Large, round hard-shell gourds
Steps:
- Cut gourd in half horizontally (use a fine-tooth saw for clean cut)
- Remove all interior material; sand thoroughly
- Shape rim with carbide burr for comfortable lip
- Sand progressively from 120 to 320 grit
- Apply food-safe mineral oil finish; cure 48 hours
Selling tip: Bundle sets of 3 small bowls for cheese/condiment service.
3. Basic Birdhouses
Key considerations: Proper ventilation, drainage, and predator protection.
Steps:
- Select a dipper or bottle gourd with sturdy stem
- Drill entry hole (size appropriate for target bird species)
- Drill 2–3 small drainage holes in bottom
- Drill hanging holes near stem; attach weather-resistant cord
- Leave interior unfinished (birds prefer natural texture)
- Optional: Add a removable clean-out panel
Ecological note: Avoid painting the interior; use only exterior finishes.
Intermediate Projects (Develop Skills)
4. Relief-Carved Wall Art
- Transfer a simple design (leaf, animal silhouette, geometric pattern)
- Use carbide burrs to lower background areas
- Refine raised elements with diamond bits
- Finish with stain or paint to enhance contrast
5. Pierced Pendant Lanterns
- Create intricate lace-like patterns using small drill bits
- Support thin sections with masking tape during cutting
- Finish with light-colored interior paint to maximize glow
- Add decorative chain or cord for hanging
6. Textured Jewelry and Wearables
- Cut small gourds into beads, pendants, or earrings
- Carve textures or patterns on exterior
- Drill precise holes for findings
- Seal with jewelry-grade finish
Advanced Projects (Showcase Mastery)
7. Multi-Component Sculptures
- Combine multiple gourds with wood, metal, or fiber elements
- Use carving to create joinery details or decorative transitions
- Finish with coordinated treatments for cohesive aesthetic
8. Functional Art with Hardware
- Add hinges, latches, or handles to create lidded boxes
- Integrate LED lighting systems with proper wiring channels
- Combine carving with metal stamping or leather accents
9. Cultural or Narrative Pieces
- Research traditional gourd art forms (African calabash carving, Native American vessel styles)
- Incorporate storytelling elements through sequential carving panels
- Use pyrography and painting to enhance narrative details
Turning Gourd Carving Into a Profitable Cottage Industry
For homesteaders looking to generate income, gourd crafts can become a sustainable side business with low startup costs and high perceived value.
Market Research: Where to Sell
- Etsy: Ideal for handmade, artistic pieces; strong search traffic for “handmade home decor”
- Farmers markets: Direct customer interaction; ideal for demonstrating the craft
- Craft fairs and festivals: Higher foot traffic; opportunity for wholesale inquiries
- Local gift shops and boutiques: Consignment or wholesale arrangements
- Social media (Instagram, Facebook): Build a following; drive traffic to your shop
Pro tip: Start with one platform to avoid overwhelm. Etsy + Instagram is a powerful beginner combination.
Product Strategy: What Sells Best
Based on market data and artisan reports:
| Product Type | Price Range | Profit Margin | Best For |
|---|---|---|---|
| Small lanterns | $25–$45 | 60–75% | Beginners, high volume |
| Decorative bowls | $30–$60 | 50–70% | Intermediate carvers |
| Birdhouses | $35–$75 | 55–75% | Eco-conscious markets |
| Relief-carved art | $75–$200+ | 70–85% | Advanced artists |
| Custom commissions | $100–$500+ | 80%+ | Established reputation |
Key insight: Intricate designs and storytelling elements command premium prices. A simple lantern sells for $30; the same lantern with hand-carved floral patterns and pyrography can sell for $85+.
Pricing Your Work: A Sustainable Formula
Don’t undervalue your time. Use this framework:
Materials cost (gourd + finish + hardware) = $X
Time spent (hours × your target hourly rate) = $Y
Overhead (tools, marketing, platform fees) = $Z
Wholesale price = (X + Y + Z) × 2
Retail price = Wholesale price × 2Example:
- Materials: $5 (gourd) + $3 (finish) + $2 (hardware) = $10
- Time: 2 hours × $20/hour = $40
- Overhead allocation: $5
- Total cost: $55
- Wholesale price: $110
- Retail price: $220
Reality check: Start with simpler pricing as you build skills and reputation, then increase as your work gains recognition.
Photography That Sells
Online sales live or die by photos.
Essential tips:
- Use natural, diffused light (near a window, not direct sun)
- Shoot on a neutral background (white, light wood, or fabric)
- Include multiple angles: front, detail shots, scale reference (hand or coin)
- Show the piece in use: lantern glowing, bowl holding fruit, birdhouse on a post
- Edit minimally: adjust brightness/contrast; avoid heavy filters
Budget setup: Smartphone + white poster board + window light + free editing app (Snapseed, Lightroom Mobile).
Packaging and Shipping
Gourds are lightweight but fragile.
Packaging essentials:
- Wrap finished pieces in acid-free tissue paper
- Use bubble wrap or biodegradable packing peanuts for cushioning
- Choose rigid boxes slightly larger than the item
- Include a handwritten thank-you note and care instructions
- For food-contact items: include material safety information
Shipping tip: Offer “local pickup” options to save on shipping costs and build community connections.
Legal and Practical Considerations
- Business license: Check local requirements for home-based craft businesses
- Sales tax: Understand your state’s requirements for online sales
- Liability: For food-contact items, clearly state “decorative use only” unless using certified food-safe finishes
- Insurance: Consider craft business insurance for valuable inventory or market participation
Safety First: Comprehensive Protection Protocols
Gourd dust and mold spores pose real health risks. Never skip safety measures.
Respiratory Protection (Non-Negotiable)
- Minimum: N95 respirator mask for light work
- Recommended: Half-face respirator with P100 filters for regular carving
- Professional: Powered air-purifying respirator (PAPR) for daily production work
Why it matters: Inhaling gourd dust can cause “gourd flu”—symptoms include coughing, wheezing, headaches, and in severe cases, respiratory infections that last weeks.
Eye and Ear Protection
- Safety glasses with side shields: Protect from flying debris and dust
- Hearing protection: Foam earplugs or earmuffs when using power tools for extended periods
Workspace Setup
- Ventilation: Work outdoors when possible. If indoors, use a fan exhausting to outside + open windows
- Dust collection: Position a shop vacuum with HEPA filter near your work area to capture airborne particles
- Surface protection: Cover work surfaces with disposable paper or easily cleaned materials
- Clothing: Wear long sleeves, pants, and a dedicated “craft apron.” Change clothes after dusty work sessions.
Tool Safety Practices
- Secure your work: Use clamps, vises, or non-slip mats—never hold a gourd in your hand while carving
- Bit changes: Unplug the tool before changing bits to prevent accidental activation
- Cord management: Keep power cords away from cutting paths to avoid accidental cuts
- Fatigue awareness: Take breaks every 30–45 minutes; tired hands lead to mistakes
First Aid Preparedness
Keep a basic first aid kit nearby including:
- Antiseptic wipes for minor cuts
- Bandages of various sizes
- Eye wash solution
- Knowledge of when to seek medical attention (deep cuts, persistent respiratory symptoms)
Tool Maintenance: Extending Bit Life and Tool Performance
Quality tools last longer with proper care.
Cleaning Carbide and Diamond Bits
Resin and gourd pulp quickly clog bit surfaces, reducing cutting efficiency.
Simple cleaning method (recommended by master carver Bonnie Gibson):
- Place bits in a small glass jar
- Cover with acetone or isopropyl alcohol
- Soak for 15–30 minutes to dissolve resin buildup
- Scrub gently with a brass-bristle brush (an old toothbrush works)
- Rinse with water, dry thoroughly, and store in a protective case
Frequency: Clean bits after every 2–3 hours of carving, or whenever you notice reduced cutting performance.
Rotary Tool Maintenance
- Motor brushes: Check annually; replace when tool loses power or sparks excessively
- Collet care: Keep clean and lightly oiled to prevent bit slippage
- Cord inspection: Regularly check for fraying or damage; replace if compromised
- Storage: Store in a dry, dust-free case; avoid dropping or impacting the tool
Flex Shaft Care
- Avoid tight bends in the cable (can damage internal drive shaft)
- Lubricate the handpiece collet occasionally with a drop of light oil
- Store coiled loosely, not tightly wound
Pro tip: Keep a dedicated “bit cleaning station” with jar, brush, and gloves near your carving area to make maintenance habitual.
Troubleshooting Common Gourd Carving Problems
| Problem | Likely Cause | Solution |
|---|---|---|
| Smoke/burning during carving | Bit dull, speed too high, too much pressure | Sharpen/replace bit; reduce speed; use lighter pressure |
| Cracking around cut edges | Gourd not fully cured, cutting too aggressively | Ensure proper curing; use sharp bits with light passes; support thin sections with tape |
| Rough, splintered edges | Dull bit, wrong bit type, incorrect speed | Use sharp carbide for removal, diamond for finishing; adjust speed to material |
| Bit slipping in collet | Collet dirty or worn, bit shank damaged | Clean collet; ensure bit shank is undamaged; tighten collet properly |
| Uneven carving depth | Inconsistent pressure, poor visibility | Use flex shaft for better control; improve lighting; practice consistent hand pressure |
| Mold appearing after finishing | Incomplete curing, moisture trapped inside | Ensure gourds are fully cured before carving; avoid sealing until interior is dry |
| Finish not adhering | Surface not cleaned/sanded properly | Wipe with alcohol before finishing; sand to appropriate grit; test finish on scrap first |
When to start over: If a gourd develops soft spots, foul odors, or active mold penetration during carving, discard it. Continuing risks contaminating your workspace and tools.
Design Resources and Pattern Creation
Finding Inspiration
- Nature: Leaves, flowers, animal tracks, geological patterns
- Cultural art: Research traditional gourd art from Africa, South America, and Indigenous North American cultures
- Architecture: Stained glass patterns, wrought iron designs, tile motifs
- Personal meaning: Family symbols, seasonal themes, memorial pieces
Creating Your Own Patterns
- Sketch simple shapes first: Circles, triangles, and lines build foundational skills
- Use transfer methods:
- Pencil and carbon paper for direct transfer
- Projector apps to scale images onto gourds
- Freehand drawing with light pencil marks
- Test on paper first: Cut paper patterns to visualize pierced designs before committing to gourd
- Photograph your work: Build a portfolio of designs that resonate with customers
Free and Paid Resources
- Pinterest: Search “gourd carving patterns” for thousands of ideas
- Etsy: Purchase digital pattern downloads from experienced artists ($3–$15)
- Gourd societies: Local and national groups often share patterns with members
- Library resources: Books like The Complete Book of Gourd Carving offer step-by-step projects
Pro tip: Keep a “design journal” with sketches, photos, and notes on what worked. This becomes invaluable as your style evolves.
Seasonal Project Ideas and Cultural Context
Spring
- Birdhouses: Time nesting boxes for spring migration
- Planters: Carve gourds as unique seedling pots (drill drainage holes)
- Easter decorations: Paint or carve egg-shaped gourds
Summer
- Lanterns for outdoor entertaining: Perfect for patio lighting
- Garden markers: Carve herb names into small gourds on stakes
- Wind chimes: Combine carved gourds with metal or wood elements
Fall
- Harvest decorations: Carve leaves, pumpkins, or thanksgiving motifs
- Halloween lanterns: Pierced designs with spooky themes
- Gift preparation: Start holiday inventory during slower summer carving time
Winter
- Holiday ornaments: Miniature carved gourds with festive designs
- Candle holders: Heat-resistant designs for winter ambiance
- Indoor decor: Bowls and sculptures that complement cozy interiors
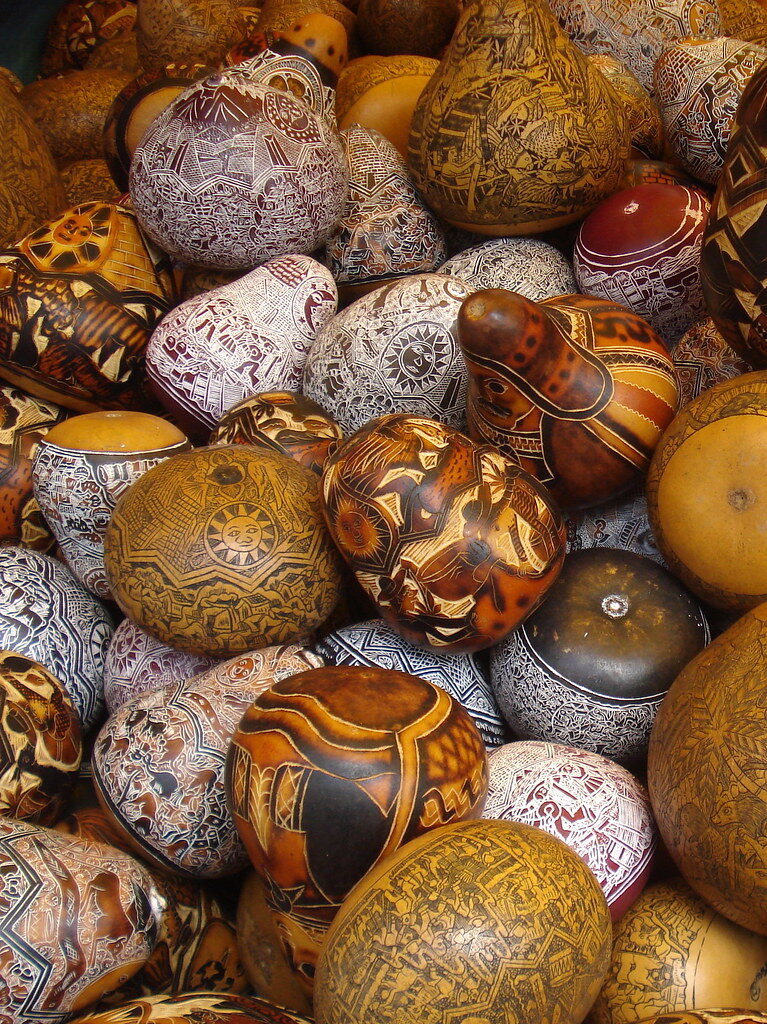
Honoring Cultural Traditions
Gourd art has deep roots worldwide:
- West Africa: Calabash drums and storytelling vessels
- Andes: Decorated mate gourds for traditional beverages
- Native American cultures: Water containers, rattles, and ceremonial objects
- Asia: Gourd ladles, containers, and musical instruments
Respectful practice: When drawing inspiration from cultural traditions, research their significance, credit sources when sharing, and consider supporting artisans from those cultures through fair-trade purchases.
Final Thoughts: Your Gourd Carving Journey Starts Now
Gourd carving is one of the most rewarding crafts for homesteaders and cottage artisans. It connects you to ancient human traditions while offering modern creative and entrepreneurial opportunities.
With just a rotary tool and a few quality carving bits, you can transform simple dried gourds into beautiful functional art. The key points to remember:
✅ Rotary tools are the most versatile tool for gourd carving—start with a Dremel 4000 if possible
✅ Carbide burrs are your primary workhorse bits; diamond bits excel at fine details
✅ Proper curing is non-negotiable – rushing this step ruins pieces and wastes effort
✅ Safety isn’t optional – respiratory protection prevents serious health issues
✅ Start simple, then expand – master lanterns before attempting complex relief carving
✅ Value your time – price your work to sustain your craft long-term
With a modest investment of around $110–$150, you can assemble a tool kit capable of producing professional-quality gourd carvings. For homesteaders growing gourds, this opens the door to an entire world of creative possibilities—from handmade household items to products that can be sold through a cottage industry.
And the best part?
Every gourd is unique—shaped by sun, soil, and season—which means every piece you create will be one-of-a-kind. In a world of mass production, that authenticity is your greatest asset.