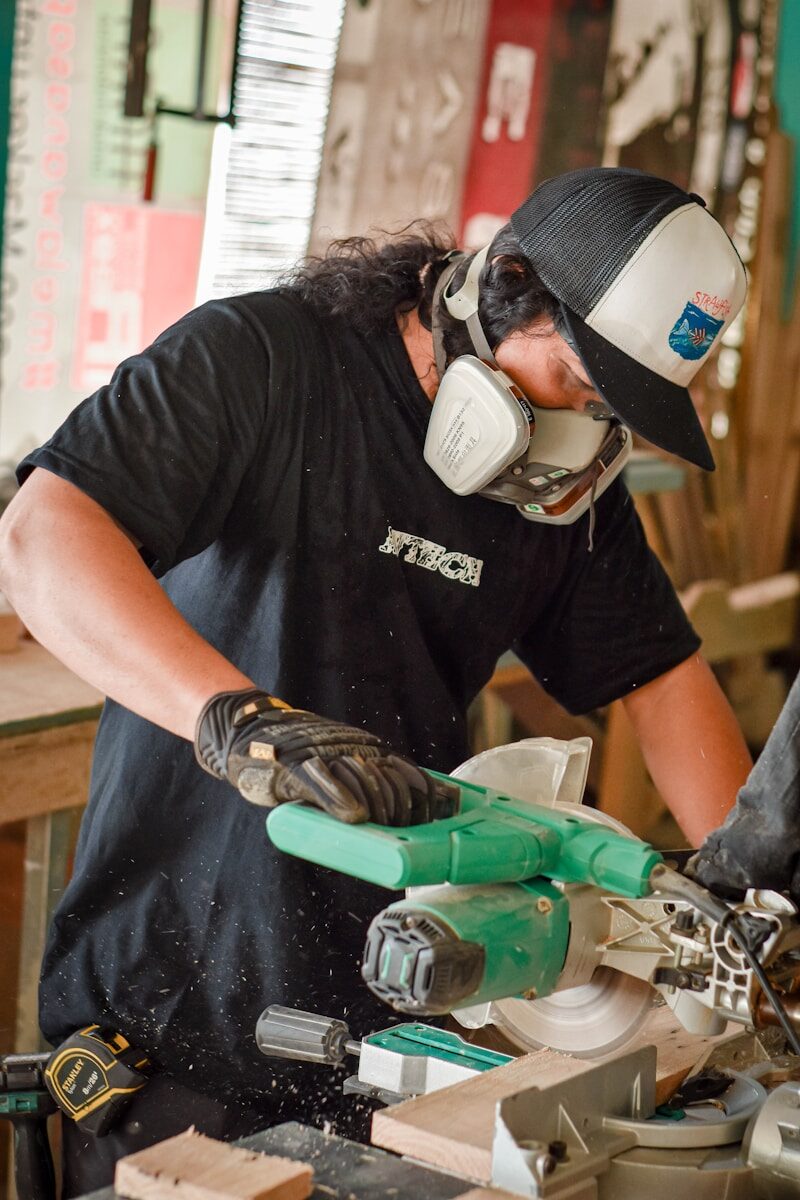
Homestead Woodworking: The Beginner’s Guide to Building for Your Property
There is a particular satisfaction in building something your animals will use, your garden will grow in, or your family will eat from. Woodworking on a homestead is different from shop woodworking in an important way: the projects are not decorative. A chicken coop that does not keep out predators is a failed coop regardless of how cleanly the joints fit. A raised bed that rots in two seasons wasted the lumber and the weekend. A compost bin that falls apart under the weight of wet material is a problem, not a project.
This guide is for homesteaders who want to build practical things for their property and who are starting with basic skills or no skills at all. It covers the tools worth buying first, the skills worth learning before the skills that can wait, and the projects that make sense as a learning sequence from simple to complex.
Why Homestead Woodworking Is Different From Shop Woodworking
Most beginner woodworking guides assume the goal is fine furniture or decorative boxes. The techniques they teach, hand-cut dovetails, perfectly fitted mortise and tenon joints, furniture-grade surface preparation, are beautiful skills that do not transfer directly to building things that will sit outdoors in weather and under load.
Homestead woodworking requires a different emphasis:
Outdoor durability matters more than finished appearance. A chicken coop that looks rough but stays solid through five winters is better than a beautiful coop that develops rot in the floor because the builder used the wrong lumber species for ground contact.
Structural integrity matters more than joinery elegance. A raised garden bed needs corners that hold against the pressure of hundreds of pounds of wet soil, not hand-fitted joints that look impressive in a photograph.
Speed and cost efficiency matter. Most homestead woodworking projects are functional infrastructure. Spending two weekends on a project that should take one afternoon is a problem if you also have animals to feed, a garden to tend, and a dozen other builds on the list.
This does not mean quality does not matter. It means the quality metrics are different: durability, structural strength, weather resistance, and practical function rather than visual perfection.
The Tools Worth Buying First
Tool acquisition is where beginning woodworkers most often go wrong, either buying too many tools before they understand what they need, or buying cheap tools that make the work harder and the results worse.
For homestead woodworking, there is a clear sequence of tools that builds capability efficiently.
A circular saw is the first power tool worth owning. It cuts lumber to length, rips boards, and handles most of the dimensional cutting that homestead projects require. A quality circular saw with a sharp blade does 80 percent of the cutting work on any given project. The remaining 20 percent involves cuts that require other tools, but starting with a circular saw and learning to use it well is the right foundation.
Look for a saw in the 7 to 7.25-inch blade diameter range with a 15-amp motor. Corded models in this class from Milwaukee, DeWalt, or Makita hold up to demanding outdoor use better than budget options. Blade quality matters as much as saw quality: a $50 saw with a sharp, quality blade cuts better than a $200 saw with a dull blade.
A drill-driver is the second essential tool. Not just for drilling holes but for driving screws, which is how most homestead woodworking projects are assembled. A 12-volt or 18-volt cordless drill-driver with two batteries handles the demands of outdoor project assembly.
A jigsaw handles curved cuts that a circular saw cannot make: the arc at the corner of a coop access door, the rounded top of a compost bin lid, the circular openings in a birdhouse gourd mounting board. A mid-range jigsaw from any of the major tool brands handles these tasks adequately.
A speed square is a $10 tool that makes every other tool more useful. It guides the circular saw for accurate 90-degree cuts, checks corners for square, and marks lumber for cutting. Buy one before you buy anything else.
A tape measure, pencil, and marking tools are not glamorous but are where accuracy begins. A good tape measure reads clearly in both imperial and metric, has a stiff blade that extends without drooping at 6 feet, and locks reliably.
A hand saw remains useful for cuts in tight spaces where a circular saw cannot reach, for trimming boards after installation, and for rough cuts on small pieces where setting up a power saw takes longer than the cut.
What can wait: a table saw is useful but not necessary for the first dozen homestead projects. A miter saw makes crosscutting faster but is not essential when a circular saw and speed square can make the same cuts accurately. A router, planer, and jointer are shop woodworking tools that have limited application in most homestead building.
Lumber: Choosing the Right Material for Outdoor Projects
Lumber choice determines how long a project lasts. Using the wrong lumber for an outdoor application is the most common reason homestead woodworking projects fail prematurely.
Pressure treated lumber (labeled PT) has been chemically treated to resist rot, insect damage, and fungal decay. It is the appropriate choice for any structural member that contacts or is near soil: raised bed frames, fence posts, pergola posts, anything that sits on or in the ground. Current pressure treatment uses copper-based preservatives (labeled ACQ or CA). Always wear gloves when cutting PT lumber, cut outdoors or with good ventilation, and do not burn the scraps.
Do not use pressure treated lumber for the interior of a raised vegetable bed without a barrier between the lumber and the soil. While current treatments are considered safe, many gardeners prefer a liner of heavy-duty landscape fabric or food-safe rubber between PT lumber and the soil their vegetables grow in.
Cedar is the premium choice for outdoor projects where PT lumber is not required. Western red cedar contains natural oils that resist rot and insect damage without chemical treatment. It is lightweight, easy to work, takes fasteners well, and ages beautifully to a silver-gray. Cedar costs more than pine but significantly outlasts untreated pine in outdoor applications. Use cedar for raised bed frames that are not in direct ground contact, coop exterior siding, garden furniture, and decorative outdoor structures.
Redwood is similar to cedar in durability and is more commonly available in western US markets. The same applications apply.
Douglas fir is a strong, dense softwood appropriate for framing and structural applications. It is not naturally rot-resistant and requires paint or sealer for outdoor longevity. Use it for framing members that will be protected by a roof or cladding.
Pine (SPF – Spruce/Pine/Fir dimensional lumber) is the standard framing lumber available at every home center. It is inexpensive and adequate for structural applications that will be protected from moisture. For unprotected outdoor use, it rots quickly without treatment or sealing. Do not build a raised garden bed from untreated SPF pine and expect it to last more than two or three seasons in wet climates.
Exterior plywood (rated for exterior exposure) is useful for coop walls, bin panels, and sheeting. Look for the exterior (EXT) or sheathing (CDX) grade rating. Interior-grade plywood delaminates when exposed to moisture.
Fasteners: What Holds It Together
The fasteners you use in outdoor woodworking projects affect longevity as much as the lumber choice.
Exterior-rated screws (labeled for outdoor use, typically with a green or gold coating or made from stainless steel) resist corrosion that causes standard interior screws to rust, stain the wood, and fail. For most homestead projects, 1.5 to 3-inch exterior screws in appropriate diameter for the application handle the fastening work.
Galvanized nails or screws for hardware cloth attachment. Standard steel fasteners rust quickly when in contact with the copper compounds in pressure treated lumber and will fail faster than the PT lumber itself. Use hot-dipped galvanized or stainless fasteners with PT lumber.
Structural screws for heavy framing connections. Where rafters meet top plates, where beams bear on posts, and where structural loads concentrate, dedicated structural screws (Simpson Strong-Tie screws or equivalent) provide rated load capacity that standard deck screws do not.
Construction adhesive in combination with screws improves the rigidity of assembled panels, reduces racking, and seals end grain on wood joints against moisture entry.
A Learning Sequence: Projects in Order of Complexity
The most efficient way to learn homestead woodworking is to build projects that increase in complexity while producing things you actually need. Here is a sequence that builds skills progressively.
Project 1: A simple sawhorse. Two sawhorses take a few hours to build, require only basic cuts, and teach you how your circular saw handles lumber, how your drill-driver drives screws into different wood thicknesses, and how a speed square helps you maintain accurate angles. You will use sawhorses for every subsequent project.
Project 2: A basic raised garden bed. A 4-by-8-foot or 4-by-4-foot raised bed made from 2-by-10 or 2-by-12 cedar or pressure treated lumber teaches corner assembly, how to work level on uneven ground, and how to use stakes or corner brackets to reinforce joints under soil pressure. This is a genuinely useful project that most homesteads need in multiples.
Project 3: A simple compost bin. A three-sided pallet-based or framed compost bin teaches panel assembly, how to attach hardware cloth, and how to design for practical use (access from the front for turning, removable front boards for getting the finished compost out). The working compost bin produced by this project also feeds directly into the homestead’s fertility system.
Project 4: A small tool shed or storage structure. Building a basic lean-to or shed introduces framing concepts: wall framing with studs, roof pitch, rafter cuts, and weather-resistant roofing. This is the most complex of the early projects and the one where mistakes have the biggest consequences.
Project 5: A chicken coop. Once you have the framing skills from the shed project and the hardware cloth installation experience from the compost bin, a chicken coop is an achievable project. It combines framing, ventilation design, nest box installation, roost construction, hardware cloth security work, and predator-resistant latch installation into a single complex build.
Each project in this sequence uses skills from the previous one and introduces new skills needed for the next. Building them in order avoids the common mistake of attempting a complex coop build before understanding how to frame a wall accurately.
Working Safely Outdoors
Outdoor woodworking has specific safety considerations that shop woodworking guides often do not cover.
Extension cord management is a genuine hazard on outdoor project sites. Use heavy-duty outdoor extension cords rated for the amperage draw of your tools (12-gauge for tools drawing 10 to 15 amps), keep cords away from work areas, and use GFCI-protected outlets or a GFCI extension cord when working in conditions where the cord might contact moisture.
Sawdust and cut lumber debris create tripping hazards on outdoor sites. Clear the work area regularly and keep walkways clear.
Eye protection is essential when using power tools outdoors where debris can travel farther and in less predictable directions than in an enclosed shop. Use safety glasses or a face shield for every cut.
Hearing protection for extended cutting sessions. Circular saws typically run at 90 to 100 decibels, above the threshold where extended exposure causes hearing damage.
Work gloves for handling rough lumber, pressure treated lumber, and metal hardware cloth. The splinters in rough dimensional lumber are significantly worse than those in furniture-grade lumber.
Planning Before Building
Every homestead woodworking project benefits from a written cut list and a rough sketch before you touch a piece of lumber. The planning process reveals the number of lumber pieces needed, the cuts required, the fastener and hardware quantities, and the potential sequence problems before they become wasted material.
A cut list is simply a table of every piece of lumber in the project with its dimensions and quantity. Making a cut list before going to the lumber yard prevents the two most common material problems: buying too little (requiring a second trip) and buying too much (wasting money).
A rough sketch does not need to be architectural. A pencil drawing that shows how the pieces relate to each other, what attaches where, and what the overall dimensions are is enough to catch design problems before they become construction problems.
The planning investment of 30 minutes typically saves 2 to 3 hours of rework.
Recommended Starting Tools
DeWalt 7-1/4 inch circular saw is the most recommended circular saw for homestead project work.
Milwaukee M18 drill-driver kit with two batteries
Bosch jigsaw variable speed for curved cuts and openings.
Speed square set with pencil and chalk line
25-foot tape measure heavy duty
Exterior deck screws assorted box
Safety glasses anti-fog set of 3
Hearing protection earmuffs for power tools
Explore the full homestead woodworking series: how to build a chicken coop, how to build raised garden beds, DIY compost bin plans, best circular saw for beginners, and essential power tools for homesteaders.
