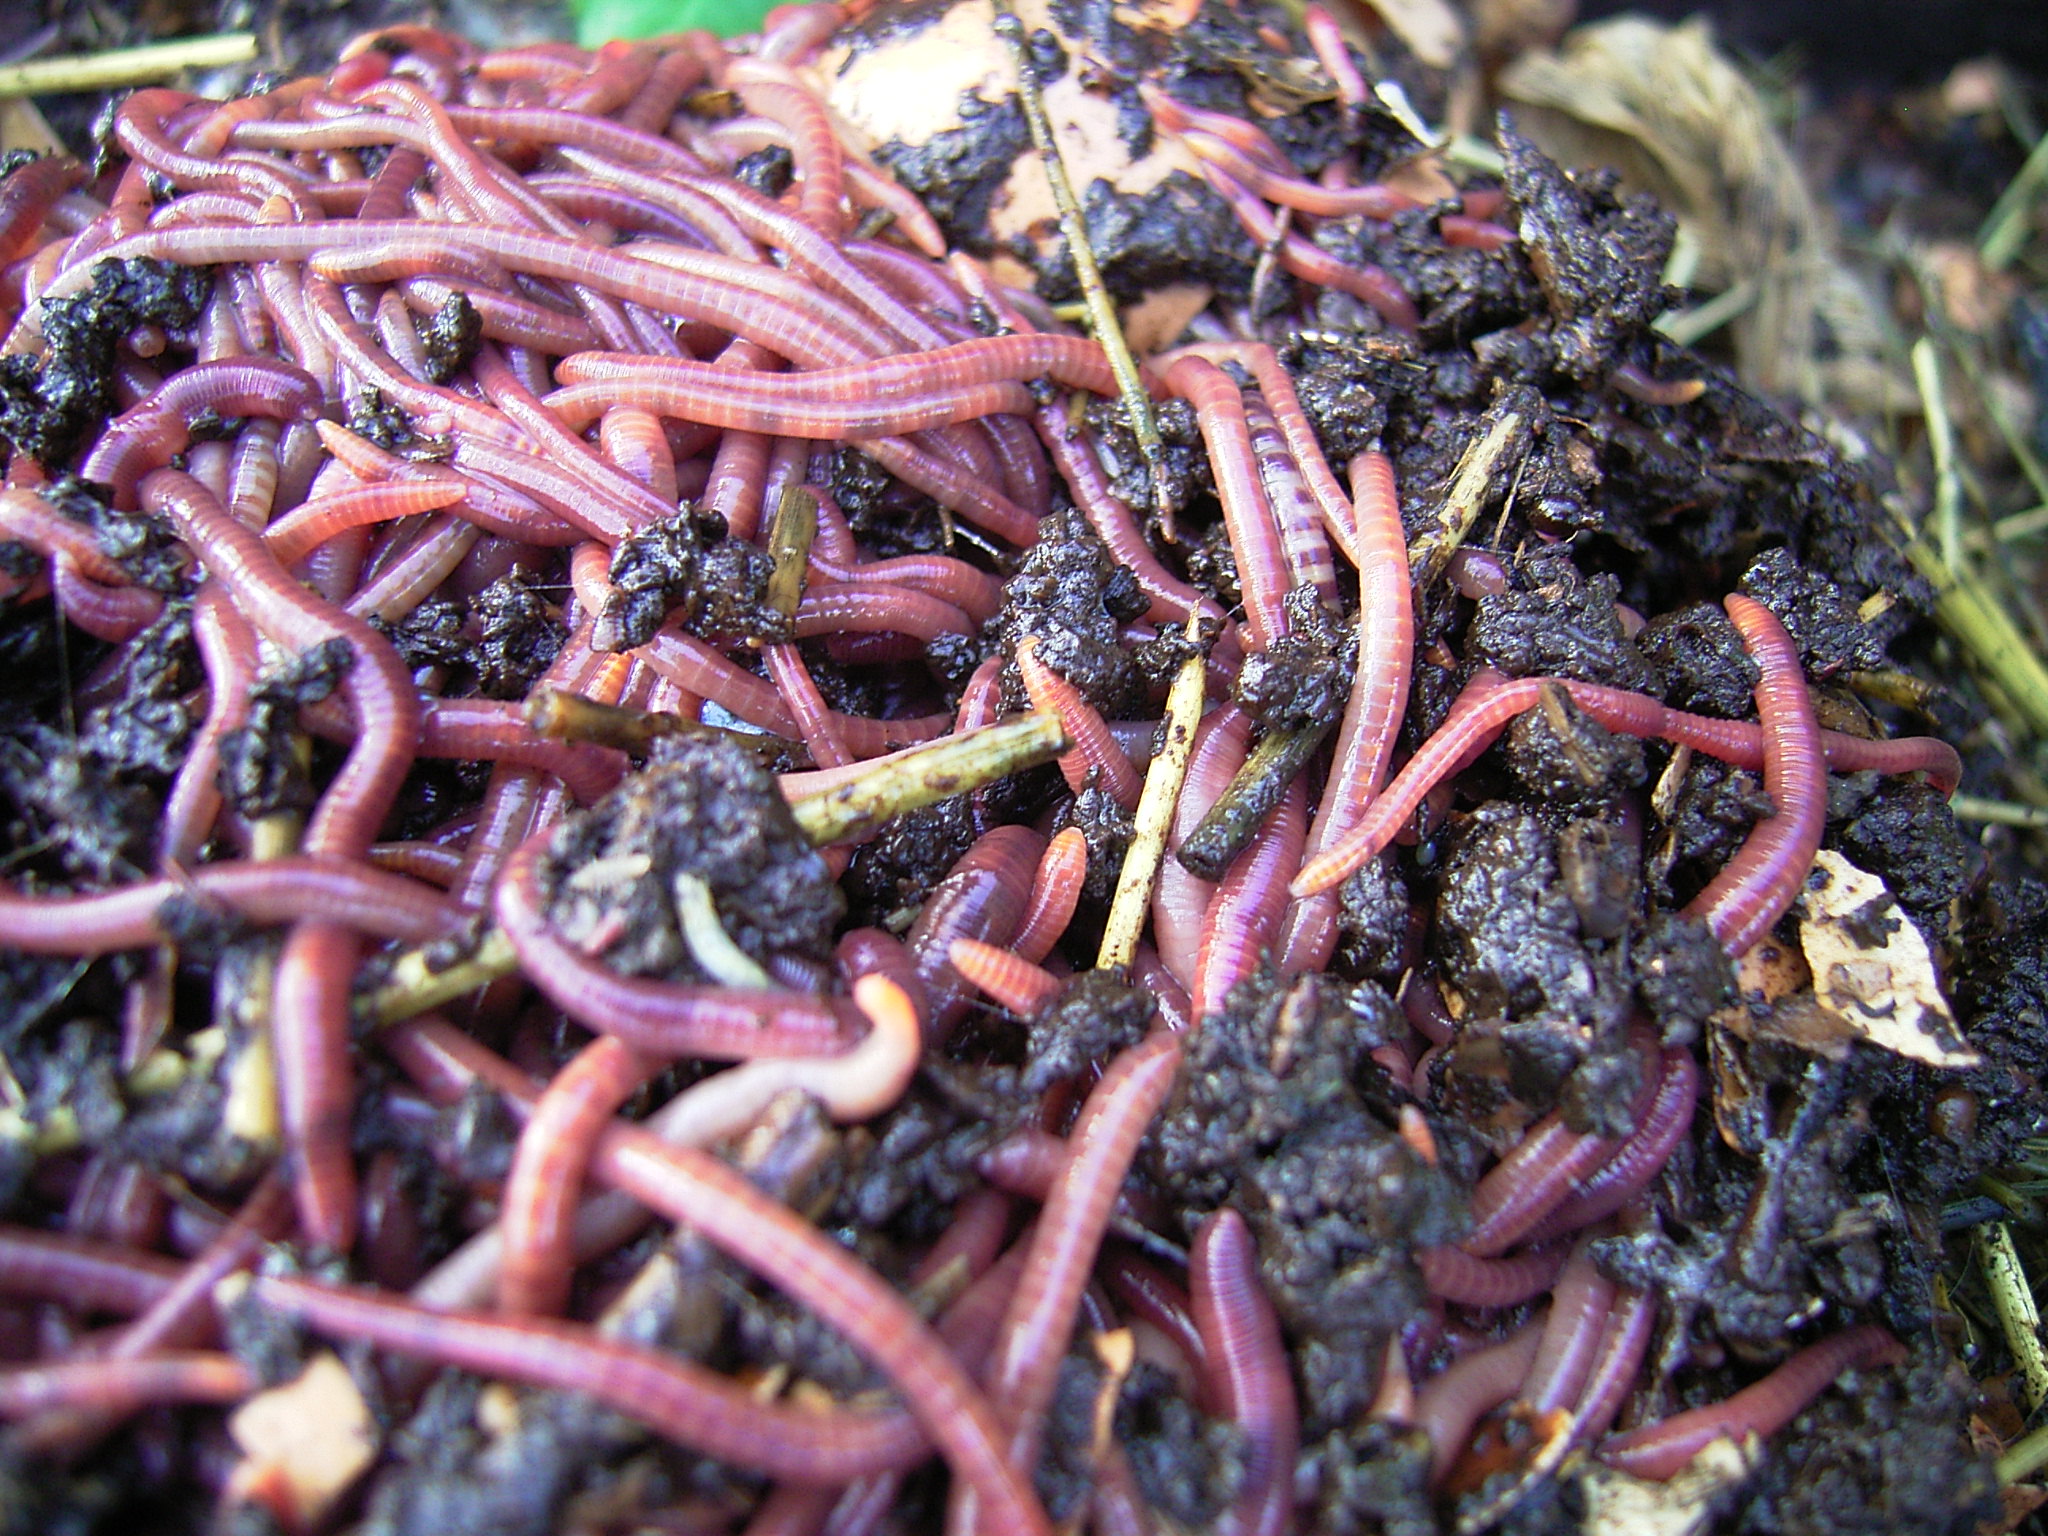
Vermicomposting for Beginners: The Complete Guide to Worm Composting
Most people discover vermicomposting by accident. A chicken keeper notices that worms congregate under the coop. A gardener reads about worm castings outperforming compost on tomato yield. A homesteader wonders what to do with a kitchen piled with coffee grounds and vegetable scraps. However you got here, you’re about to learn one of the most practical, low-cost, and genuinely satisfying skills in the homesteading toolkit.
Vermicomposting is the process of using specific species of worms to break down organic waste into worm castings, one of the richest natural fertilizers available. Unlike traditional composting, it works indoors, it works in small spaces, it works year-round, and it produces a finished product in 60 to 90 days instead of 6 to 12 months. The worms do the work. You supply the food and a reasonable environment. That is essentially the entire job.
This guide covers everything a new worm composter needs to know: the right worms, the right bin, how to set it up, what to feed, what to avoid, how to harvest castings, and how to troubleshoot the problems that actually happen to real beginners.
Why Vermicomposting Works Better Than Traditional Composting
Traditional composting relies on microbial activity to break down organic matter. It works, but it requires a careful balance of carbon and nitrogen, regular turning, moisture monitoring, and enough volume to generate the heat needed to kill pathogens and weed seeds. Done well, it produces excellent compost. Done imperfectly, which is most of the time, it produces a slow, sometimes smelly pile that takes six months to a year to finish.
Vermicomposting bypasses most of that complexity. Red wigglers eat organic material and excrete worm castings, which contain higher concentrations of nitrogen, phosphorus, potassium, and beneficial microbes than traditionally composted material. Research from Cornell University and Ohio State Extension has consistently shown that plants grown with worm castings outperform those grown with equivalent amounts of traditional compost, particularly in germination rates and early root development.
The practical benefits for a homesteader are significant. You can run a worm bin in a garage, basement, under a kitchen sink, or in any space that stays between 55 and 77 degrees Fahrenheit. There is no pile to turn. There is no pile to smell, if managed correctly. You can scale it to exactly the waste stream you produce. A single bin handles the kitchen scraps from a typical household. A larger system handles scraps plus garden waste plus chicken coop byproducts.
Which Worms You Actually Need
This is where most beginners go wrong before they even start. They assume any earthworm will work for composting, dig some up from the garden, and wonder why their bin fails within a few weeks.
Garden earthworms are what scientists call anecic worms. They burrow deep into soil, following moisture and nutrients down through the soil profile. Put them in a shallow bin with no soil to burrow into and they will try to escape, and they will die. They are not composting worms.
The worms that work for vermicomposting are epigeic species. They live in the top layer of soil and leaf litter, not deep underground. They are adapted to feeding on decomposing organic material in concentrated form. The two species you need to know are:
Red wigglers (Eisenia fetida) are the gold standard for home vermicomposting. They reproduce quickly, tolerate a wide range of conditions, consume roughly half their body weight in organic material daily, and thrive in the shallow, dense conditions of a worm bin. They are the default choice for beginners and experienced worm farmers alike.
European nightcrawlers (Eisenia hortensis) are larger and produce larger castings. They are also used as fishing bait, which gives them a secondary income angle. They tolerate cooler temperatures slightly better than red wigglers but reproduce more slowly. Many experienced worm farmers keep both species in separate systems.
For your first bin, start with red wigglers. They are the most forgiving, the most widely available, and the most studied. You can source them from reputable online suppliers like Uncle Jim’s Worm Farm, The Squirm Firm, or Planet Natural. A half-pound to one pound of worms is the right starting quantity for a standard household bin.
Choosing Your First Worm Bin
Worm bins range from a repurposed plastic storage tote to a precision-engineered multi-tray flow-through system. All of them work. The differences are in convenience, capacity, and how much effort harvesting castings requires.
DIY plastic tote bin is the classic beginner setup. A 10 to 18-gallon opaque plastic storage bin with a lid, drilled with half-inch ventilation holes around the sides and bottom drainage holes, works perfectly well. Cost is under $15. The downside is that harvesting requires separating worms from finished castings manually, which takes time.
Stacking tray systems like the Worm Factory 360 use a series of mesh-bottom trays. Worms migrate upward into fresh food, leaving finished castings below in a tray you can remove and use directly. Harvesting takes minutes instead of hours. These systems cost $80 to $150 and are worth it if you plan to compost continuously rather than in batches.
Flow-through systems like the Hungry Bin are designed for higher volume. Worms feed at the top and finished castings drop out the bottom continuously. They cost $150 to $200 and are the right choice for serious production or if you plan to sell castings.
For a first bin, either a DIY tote or a Worm Factory 360 style stacking system is appropriate. The stacking system saves hours of harvest labor over time and the investment pays off within the first year.
Setting Up Your Bin: Bedding, Moisture, and First Feeding
Bedding is the material your worms live in when they are not actively eating. It needs to hold moisture, allow airflow, and be loosely packed enough for worms to move through freely.
The best bedding materials are:
- Shredded corrugated cardboard (remove any tape or glossy coating)
- Shredded newspaper, black ink only, not glossy inserts
- Coconut coir, which is available in compressed blocks that expand when wetted
- Aged leaves, shredded if possible
- A small amount of finished compost or garden soil to introduce beneficial microbes
Fill your bin about halfway with damp bedding. The moisture level should feel like a wrung-out sponge, wet but not dripping. Add a handful of garden soil or finished compost. This introduces the microbial community the worms need to process food efficiently.
Let the bin sit for 24 to 48 hours before adding worms. This allows temperature to equalize and any chlorine in tap water used to moisten bedding to off-gas. Then add your worms, spread them across the surface, and put the lid on. Leave them alone for three to five days before feeding. They need time to adjust.
Your first feeding should be small, roughly half a cup of food for every pound of worms. Bury it under the bedding surface. This keeps fruit flies from reaching it and encourages worms to move toward the food rather than the surface.
What to Feed Your Worms
Worms can process a wide range of kitchen and garden waste. Understanding what they eat enthusiastically, what they tolerate, and what to avoid entirely will save you from your first bin problem.
Worms eat enthusiastically:
- Fruit and vegetable scraps of any kind, including peels, cores, and trimmings
- Coffee grounds and paper coffee filters
- Tea bags (remove the staple)
- Shredded cardboard and paper, which serve as both food and bedding
- Aged herbivore manure, including chicken, rabbit, or horse manure that has composted for several weeks
- Crushed eggshells, which help regulate pH and provide grit
Worms will eat but slowly:
- Cooked vegetables, in small amounts
- Starchy foods like pasta or bread, which can attract pests if overfed
- Citrus peels, in small amounts
Never feed your worms:
- Meat, fish, or poultry, which attract pests and create serious odor problems
- Dairy products, for the same reasons
- Oily or greasy foods, which coat worms and impair their ability to breathe through their skin
- Onions and garlic in large quantities, which worms avoid and which can disrupt bin chemistry
- Pet waste, which contains pathogens incompatible with composting
- Heavily salted food scraps, as salt is toxic to worms
The single most common beginner mistake is overfeeding. A worm bin with too much uneaten food generates anaerobic conditions, which causes bad smells and can kill worms. Feed only what the worms can process in three to four days. As your worm population grows, you can increase feeding frequency.
Temperature, Moisture, and Light
Temperature is the factor most beginners overlook. Red wigglers are most productive between 65 and 77 degrees Fahrenheit. They can survive between 40 and 85 degrees but their feeding and reproduction slow significantly at the extremes. Below 40 degrees, they become dormant. Above 85 degrees, they will try to escape the bin and can die.
A basement, garage corner, or under-sink cabinet maintains the right range in most climates. In summer, avoid placing the bin in direct sunlight or near heat sources. In winter, keep it away from exterior walls. If you raise chickens, the ambient temperature of a well-insulated coop is often within the productive range year-round.
Moisture should remain at the wrung-out sponge level throughout the bin’s life. Dry bedding causes worms to lose moisture through their skin and stop eating. Waterlogged bedding creates anaerobic zones. Check moisture by grabbing a handful of bedding and squeezing. You should be able to squeeze out a few drops but not a stream.
Light bothers worms, which is why they stay buried during the day. An opaque bin with a lid handles this automatically. If you use a clear container, wrap it in burlap or dark fabric.
Harvesting Worm Castings
After 60 to 90 days of feeding, the original bedding will have been converted to dark, crumbly worm castings. You will notice the bin contents darkening and the texture becoming finer and more uniform. This is when to harvest.
The most practical method for a single-tray DIY bin is the migration method. Stop feeding on one side of the bin and add fresh bedding and food to the other. Over two to three weeks, most of the worms will migrate toward the fresh food. Then you can scoop out the castings-heavy side with few remaining worms.
With a stacking tray system, harvesting is much simpler. When the bottom tray is full of finished castings and worms have migrated up into fresh food trays above it, remove the bottom tray. Spread the castings in the garden, add the empty tray to the top, and add fresh bedding. The system continues uninterrupted.
Fresh castings can be used immediately or stored. They keep well in a loosely sealed bag for several months, as long as they remain slightly moist and the microbial community stays alive.
Using Worm Castings in the Garden
Worm castings are not a fertilizer in the traditional sense. They do not burn plants, even in high concentrations, because the nutrients are bound in microbial forms that plants access slowly over time. This makes them safe to apply directly to roots, mix into seed-starting mix, or use as a top dressing around established plants.
Practical application rates that consistently produce results:
- Seed starting: Mix one part castings to four parts seed starting mix. Germination rates improve measurably.
- Transplanting: Add a small handful of castings to the planting hole. This reduces transplant shock.
- Top dressing: Spread a half inch of castings around established vegetables or perennials and water in.
- Worm casting tea: Steep one cup of castings in one gallon of water for 24 hours, stirring occasionally. Strain and apply as a foliar spray or soil drench. This extends the volume of castings significantly.
Your chicken-composting-garden system has a particularly elegant loop available: chicken manure into the worm bin, worm castings into the garden, garden scraps back to the chickens. Each output feeds the next input.
Common Problems and How to Fix Them
Bin smells bad. Almost always caused by too much food, anaerobic pockets, or the wrong foods. Remove any visible rotting material that has not been processed. Add dry shredded cardboard to absorb excess moisture. Reduce feeding volume by half for two weeks.
Worms are trying to escape. This usually means conditions in the bin are wrong: too wet, too dry, too hot, or a new food addition they dislike. Check moisture and temperature first. If you recently added citrus, large amounts of onion, or any meat or dairy, remove it immediately.
Bin has fruit flies. Fruit flies come from exposed fruit scraps on the surface. Always bury food under bedding. Cover any exposed food with a layer of cardboard or damp newspaper. A small container of apple cider vinegar with a drop of dish soap near the bin catches adult flies.
Worms are not eating. New worms take a few days to settle in and begin feeding. In an established bin, slow feeding usually means the bin is too cold, too wet, or needs more bedding added. Check temperature and moisture before assuming something is wrong.
Castings look soupy or slimy. Too much moisture. Add substantial amounts of dry shredded cardboard, stir gently to aerate, and reduce watering of any food additions.
Scaling Up: From Single Bin to a Worm Farm
Once you understand how a single bin operates, scaling up is straightforward. Additional bins can process more waste, produce more castings, and if you choose European nightcrawlers in a separate system, produce fishing bait or live worms for sale.
The fastest scaling path on a homestead is to run multiple Worm Factory 360 style systems side by side. Each unit handles roughly four to six pounds of food per week at full capacity. Three units running in parallel produce enough castings to top-dress a serious vegetable garden throughout the growing season and still have surplus to sell or give away.
If selling worms or castings interests you, the articles in this cluster cover exactly how to do that, from pricing to packaging to finding buyers.
Recommended Gear for Starting Your Worm Bin
Everything you need is straightforward and available from Amazon or local farm stores.
For your first setup:
- Worm Factory 360 stacking bin system is the most recommended starter bin for those who want convenience
- Coconut coir brick expands into perfect worm bedding when wetted
- Red wiggler starter kit if you cannot source locally
- pH and moisture meter for monitoring bin conditions
- Worm bin thermometer to track temperature through seasons
—
Vermicomposting rewards patience more than effort. Your bin will not be perfect in the first week. The worm population will take a few months to reach full processing capacity. The castings you pull at harvest will be better than almost any amendment you can buy. Give the system time, resist overfeeding, and the results will follow.
Explore the rest of our vermiculture series: red wigglers vs nightcrawlers, best worm bins reviewed, worm casting tea guide, and how to sell worms from home.
